Thinking about adding a patio pergola to your backyard in Maricopa County? Good call — pergolas give shade, personality, and an excuse to linger outside longer. This guide walks you through a practical, homeowner-friendly installation from planning to the final screw, with tips for Arizona heat, monsoon gusts, and neighborhood rules. You know what? It’s easier than most folks expect, but there are a few gotchas. Let me explain.
Why build a pergola — and why now?
A pergola isn’t just a pretty frame — it’s a lifestyle upgrade. It cools your patio visually and practically, defines an outdoor room, and raises your home’s curb appeal. In Maricopa County, where summers bake everything, a pergola can make your outdoor space usable again; during monsoon season it gives a sturdy feeling, even if it won’t stop heavy rain. Sounds contradictory? It is — pergolas provide shade, not a roof — but that’s part of their charm.
First things first: permits, HOA rules, and where to put it
Before you pick lumber, check with your local city or county permitting office. Surprise fees or setbacks will kill momentum faster than a broken drill bit. Many cities in Maricopa County require a permit for structures over a certain size, and homeowners associations often have rules about color and height.
Ask yourself: will it sit on your concrete slab or do you need new footings? Placing a pergola against the house is common, but a free-standing structure offers more flexibility. Measure twice, because people always underestimate how far a pergola will shade the patio in the early evening.
Tools, Materials, and brands that actually help
Here’s the short list of tools you’ll use most: a drill/driver (DeWalt or Makita are solid), circular saw or miter saw, level, post hole digger or auger, tape measure, chalk line, and a stud finder if attaching to your house. You’ll also want Simpson Strong-Tie post anchors and exterior-grade lag screws.
For materials, many homeowners choose pressure-treated lumber for budget builds, or cedar for a nicer look and natural rot resistance. Aluminum pergolas are durable and low-maintenance; they handle heat well but feel less “woodsy.” Concrete footings typically use Quickrete or similar brands.
Step-by-step installation — a homeowner-friendly walkthrough
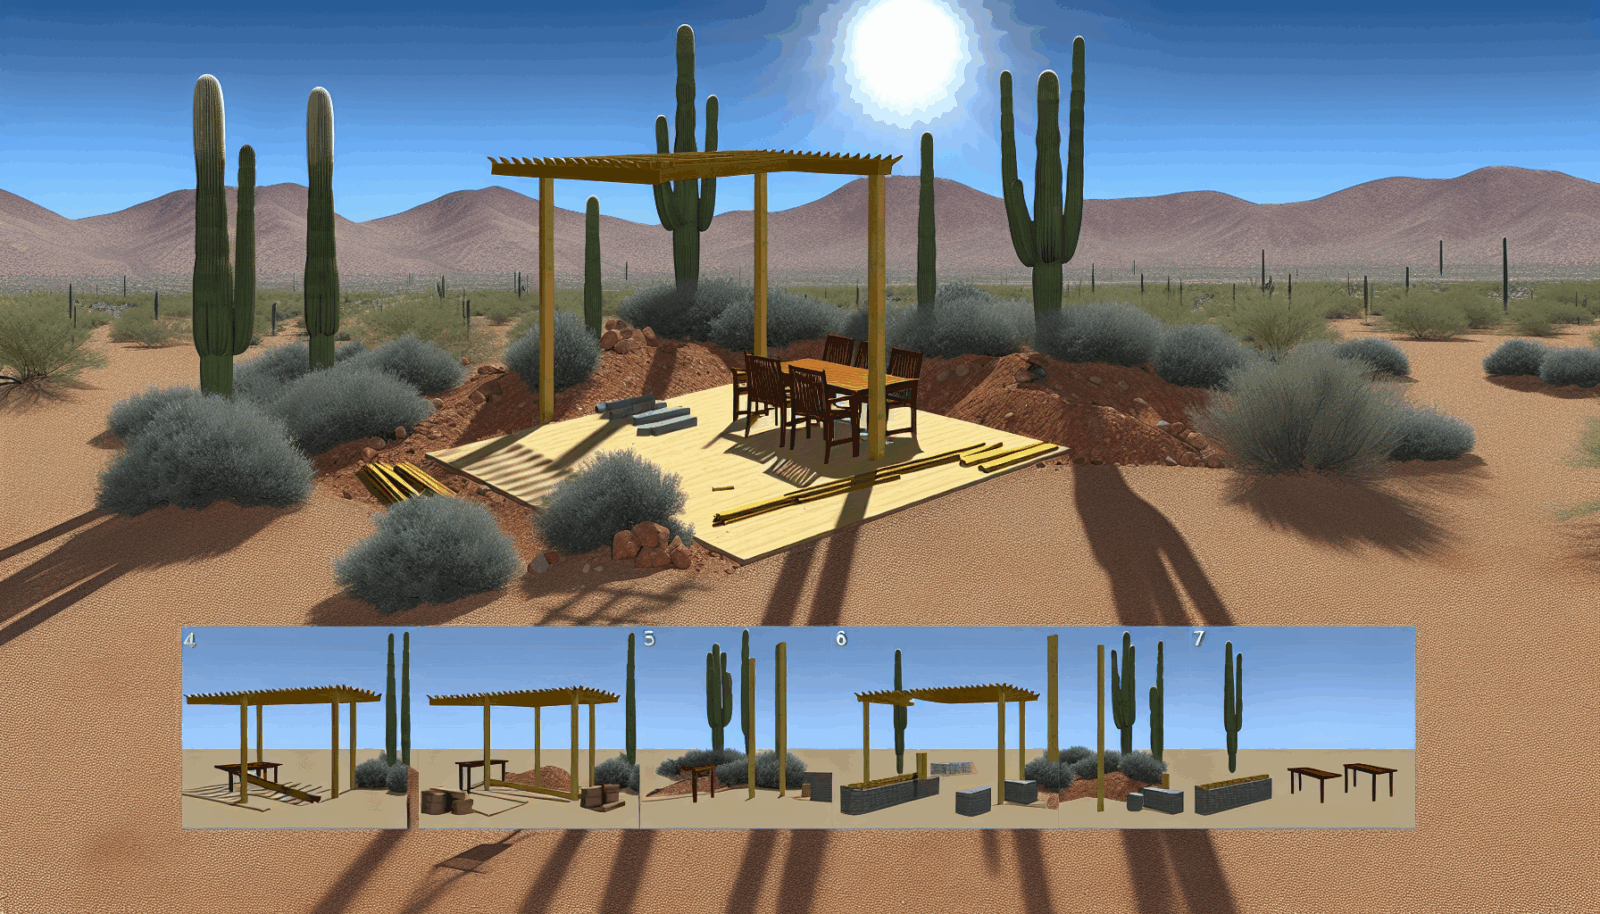
Let’s do this in a clear sequence. Follow the steps and you’ll avoid the mistakes that make weekend projects drag into months.
1. Layout and mark
Set the posts’ locations using stakes and string. Use a chalk line to ensure everything is square. A simple 3-4-5 triangle works great for checking right angles. Pro tip: mark the centerlines of posts, not the edges; that reduces confusion later.
2. Dig footings or install anchors
For most pergolas in Phoenix-area soil, 24–30 inches deep footings give good stability. Use an auger if you have one — it’s faster and easier on the back. If you’re on a concrete slab, install wedge anchors or post bases that are rated for exterior use.
3. Set the posts plumb
Stand your posts in place and brace them. Get them perfectly vertical with a torpedo level and temporary braces. Fasten base plates to the concrete or pour concrete around post anchors, following the manufacturer’s cure time. Don’t rush the concrete; patience here matters.
4. Attach beams and ledger (if attached to house)
Lift the beams onto the posts and secure with bolts and Simpson ties. If you’re attaching to the house, use a properly flashed ledger and lag screws into studs — a leak here is a homeowner’s nightmare, honestly. Use a through-bolt where possible for strength.
5. Install rafters and slats
Place rafters across the beams at your chosen spacing — commonly 12 to 24 inches on center. Cut birdsmouth notches if necessary for a tight fit. Decorative slats or lattice can go on top for more shade; remember, more slats equals more shade, but also blocks the view of the sky.
6. Finish work
Sand edges, apply exterior stain or paint (Sherwin-Williams or Benjamin Moore have UV-resistant options), and seal all cut ends. Metal connectors should be painted or galvanized to resist corrosion. Add ceiling fans or string lights once the structure is solid — ambiance matters.
Quick tips that only come from doing it once (or twice)
Always pre-drill for large screws to avoid splitting. Use stainless or hot-dipped galvanized fasteners in the desert — they last. If you’re working in summer, start early; wood gets sticky and warps in extreme heat. Also, consider adding a sail shade or retractable canopy for those brutally hot July afternoons.
You might think a pergola is low-maintenance, but it still needs checking. Tighten bolts after the first season, and touch up finishes every few years. Little care avoids big headaches later.
Arizona-specific considerations — heat, wind, and storms
Maricopa County throws unique challenges at outdoor structures. High UV means paint and stain can fade faster; choose products labeled for UV protection. Monsoon winds can be intense — if your pergola will host heavy planters or lighting, factor wind load into post anchoring. And yes, shade helps reduce local temperatures, but it won’t turn your patio into a living room; a misting system or ceiling fan adds real comfort.
Want it to last? Maintenance and upgrades
Check for checking and rot in wood, and clean out debris after storms. Re-stain every 2–4 years depending on exposure. For upgrades, integrate climbing vines (jasmines do well here), hanging baskets, or even solar shades that clip on and off. They add character and, frankly, personality — because your pergola should look like you.
Ready to get started or need a hand? Call Arizona Pergola Company at 480-568-5870 or Request a Free Quote. We’ll help you figure out permits, materials, and a timeline that fits your schedule.


